

November 20, 2009 by rocketpopcara
Filed under Art Tips, Tricks and Projects to try at Home

Steps:
Stuff a disposable glove with crumpled tissue paper. Use a rubber band to close up the bottom. Poke a hole in the Styrofoam and push rubber banded bottom of glove into the hole. Glue feather onto both sides of the fingers and palm of the stuffed glove. Cut out eyes, waddle, and beak from craft foam. Glue onto thumb. Cover the Styrofoam base with pieces of raffia.
November 19, 2009 by rocketpopcara
Filed under Art Tips, Tricks and Projects to try at Home
Materials:
1. tissue paper (brown, purple, blue, yel-
low, red, orange and green)
2. (1) 9″ x 12″ piece of newsprint
3. (1) 9” x 12” white construction paper
4. liquid starch
5. paint brush
6. black crayon

Cornucopia
Steps:
1. Cut a cornucopia out of brown tissue paper. Cut various fruit shapes from the other
colors of tissue paper.
2. Have children arrange their design first on newsprint.
3. Paint the white construction paper with liquid starch. Move the arrangement from
the newsprint to the white paper, one piece at a time. Go over the top of each piece
lightly with the liquid starch. Be careful not to go over the edges so the colors won’t
run.
4. Outline the design with crayon after it is dry. The colors of the tissue will have run a
bit and this makes it more interesting. Outline the original fruit design.
November 10, 2009 by rocketpopcara
Filed under Art Tips, Tricks and Projects to try at Home
Art word of the day …anamorphic
Anamorphic illusions drawn in a special distortion in order to create an impression of 3 dimensions when seen from one particular viewpoint.
Julian Beever is an amazing artist who creates incredible chalk drawings…..check this video out!
November 5, 2009 by rocketpopcara
Filed under Art Tips, Tricks and Projects to try at Home
Making play dough with the kids is easy and much more fun than the store bought kind…especially when you cook it… here’s our favorite recipe:
Kool-Aid Playdough with Cream of Tartar (Nonedible)
The addition of cream of tartar makes the playdough last longer. You can find cream of tartar in the baking supplies aisle at your grocery store. This playdough, if stored in an airtight container in the fridge will last months( up to 6 months ).
• 1 cup flour
• 1 cup water
• ½ cup salt
• 2 to 3 tsp cream of tartar
• 1 package Kool-Aid mix (6 g pkg)
• 1 Tbsp cooking oil
Mix the dry ingredients together in a medium saucepan. Slowly add the water mixed with oil and stir over medium heat until mixture thickens to dough. Let cool a few minutes and then knead until smooth.
October 29, 2009 by rocketpopcara
Filed under Art Tips, Tricks and Projects to try at Home
It’s the thought that counts….
As the holiday season approaches, what better way to stay within your gift budget than giving the gift of art. Family, friends, and neighbors will be thrilled to be the recipient of a meaningful and creative expression from you or your children.
Don’t forget that if the artwork is on paper or a photo, you can frame your masterpiece to give it that extra personal touch.
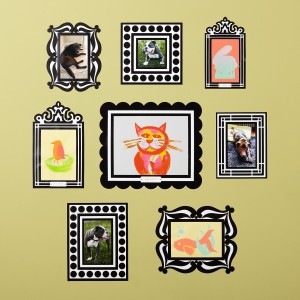
One innovative way of displaying your artwork is this adorable wall decal collection from Land Of Nod: http://www.landofnod.com/family.aspx?c=9676&f=5384 If you buy the set, you have 8 frames you can give out to multiple loved ones!

Frame Stickers
You can also make your own frame by cutting out construction paper or cardboard. Decorate with glitter, beads, ribbon, etc. Be creative!
For longer lasting impressions, visit our custom frame shop and let us help you design the perfect option.
October 26, 2009 by rocketpopcara
Filed under Art Tips, Tricks and Projects to try at Home
Who doesn’t love Halloween? It brings out the kid in all of us….pumpkins to carve, houses to decorate, costumes to make and candy to eat! If you’re looking for some fun pumpkin crafts, here are a few:
A Paper Plate Jack-O-Lantern is really easy to make and is a great decoration for your door or window. Make several with different faces and hang all over the entrance to greet trick or treaters!
Pumpkin Block Heads are a creative and unusual craft to make use of odd pieces of wood scraps. Kids will enjoy coloring and painting the pumpkin faces for Halloween.
October 23, 2009 by rocketpopcara
Filed under Art Tips, Tricks and Projects to try at Home
Acrylic paint is a fairly new addition to the world of painting. It’s only been around since the 50’s, however many artists have benefited from it’s existence over the last 55 years. Acrylic paints are super versatile and easy to use even for beginners. They can be applied thickly or in thin washes similar to watercolors. Unlike oils, acrylic paint does not yellow or harden over time. It stays “fresh” looking rather than aged.
Many artists prefer acrylics because they are fast drying and they can be applied and layered much faster than oil paints. As a beginner, be mindful of the quick dry time, as you can’t dawdle. The dry time will be even faster if you decide to paint outside on a hot sunny day, so consider working with another form of paint if you must paint outside in the heat.
Some artists like acrylics because they can mimic watercolor washes, however you must wait for one layer of acrylic to dry completely before applying another of course. After acrylic paint begins to dry it will be very difficult to modify and you will end up with hard edges. There are 2 ways to avoid this problem: 1) dampen the paper before the paint is applied or 2) use an additional brush that is damp with water. Use one brush to apply the acrylic paint and soften the edges with the other brush that has been dampened with the water immediately.
Do you need expensive acrylic paint as a beginner? In the experimental stages it’s okay to use cheaper supplies, but as you improve you may want to invest in higher quality paints. When it comes to buying art supplies, you generally get what you pay for. If you buy cheap paint, you will get a cheap looking picture lacking in vibrancy. If you buy cheap brushes, they will be likely to fall apart quickly. If you decide to commit yourself to the joy of painting, invest in equipment and materials that will yield the results you want.
September 30, 2009 by rocketpopcara
Filed under Art Tips, Tricks and Projects to try at Home
Sketching with water soluble ink can provide a really unique, colorful sketch. If you decide to sketch with water soluble ink and color with watercolors, then you want to always use the watercolors first so the ink won’t run. With this form of sketching, you can skip the under drawing sketch process and jump right into blocking areas with colors, start with light colors and gradually move toward your darkest color to give more saturation.
If you prefer to use waterproof ink or pencil, then the watercolors can be applied first or last.
Most watercolor sketchers prefer to put in the lighter colors with more water first as they can be covered later with darker colors. For example, the sky is usually a good place to start. If you are using traditional brushes, you can achieve a large expanse sky with a consistent color in a single stroke.
Let the Waterbrush work for you…
If you prefer to use waterbrushes, I would recommend breaking up the sky with clouds. The water to paint ratio in a waterbrush stroke is always changing, constantly going from dark and heavy to light and watery. If you take advantage of the water to paint ratio, you can end up with some beautiful variation within each color area. Just make sure you start the stroke where you want the color to be darkest, and complete the stroke where you want the color to be lightest. You can also provide your piece with more depth if you mix some colors on the palette and other colors right on the sketch. When you paint different colors next to each other on the sketch allowing them touch and bleed into each other and slightly overlap you will inevitably create more depth.
As always, never scrub the colors into the paper, apply with a light touch. To maintain a fresh look to your colors, limit yourself to several layers. I
Sketching with water soluble ink isn’t terribly labor intensive. As always, have fun with it!